Appointment Reminders
BreezyNotes Appointment Reminders are a fast, simple way to message your clients before their appointments that can lead to some significant decreases in No-Shows.
We designed our reminder system to be as simple as possible.
Step 1: Set Up Your Account
Go to https://breezynotes.com/appointment-reminders to request account setup. Our Support Team will let you know as soon as it’s set up (typically within one business day).
Step 2: Turn on Appointment Reminders for Your Clients
Once you’ve heard back from support, it’s time to set up your clients.
- Go to the Client’s Chart and click “Edit” on Demographics
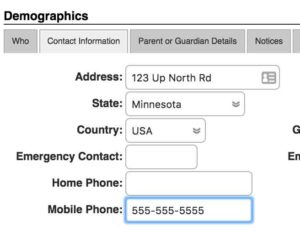
- Click the “Contact Information” Tab and enter the client’s mobile phone number in the “Mobile Phone” field.

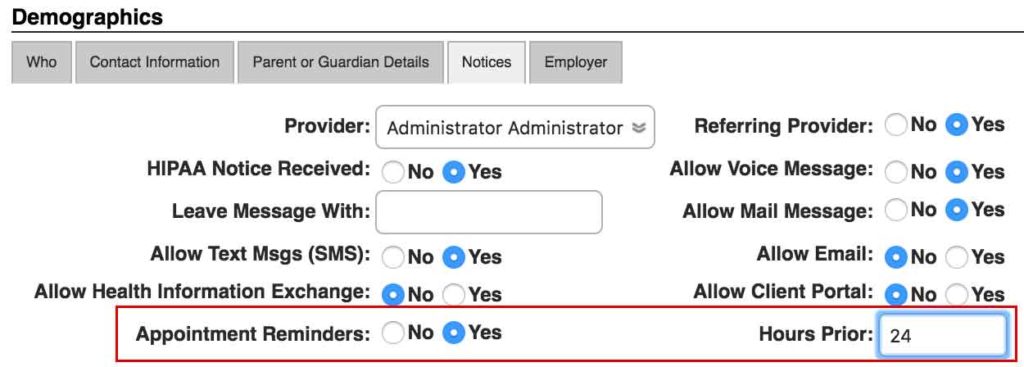
- Click the “Notices” Tab and select “Yes” next to Appointment Reminders and set your “Hours Prior”
 Note: These are the only two fields required to send appointment reminders. If “Allow Text Msgs (SMS)” is set to “No” reminders will still go out.
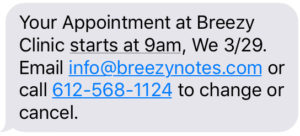
 - Appointment Reminders will now go out for any new appointments. Existing appointments will need to be updated.
Here’s an example:

Turn Off the Reminder for a Specific Appointment
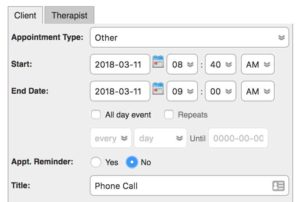
You can turn off reminders for individual appointments. This is handy if you want to put a phone call or other non-appointment on the calendar and do not want the client to receive your default reminder.
When creating an appointment, just toggle “Appt. Reminder” to “No” and click “Save.”

IMPORTANT NOTE: If a client has an appointment scheduled before you turn on Appointment Reminders for them, they will NOT receive a reminder until you manually update the existing appointment or series of appointments.
If “Appt. Reminder” is Grayed Out
If you have a series of appointments that were created before turning Appointment Reminders on for a client, you’ll need to delete and recreate that series now that Appointment Reminders are turned on.
Otherwise if a client doesn’t have appointment reminders set up, the “Appt. Reminder” field will be grayed out when you are scheduling her/him. To change this, follow Step 2 above.
