
Custom Forms
07.07.2017
Notes & Forms, Support Posts
BreezyNotes Custom forms allows our customers to document just about anything, exactly as they see fit. If you’d like a custom form created just for your practice, contact us today.
Already set up? Here are two ways to get started with BreezyNotes Custom Forms:
Start Via the Calendar:
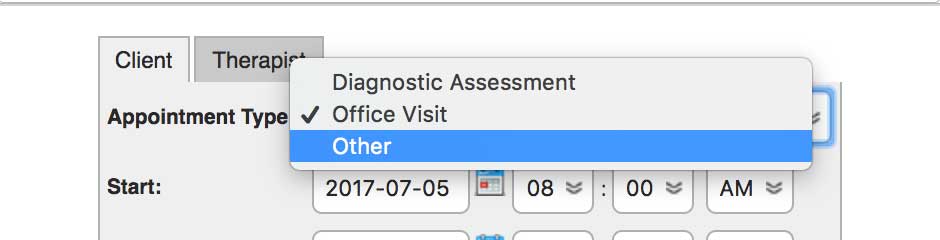
- D
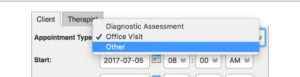 rag and drop a client to open the appointment Window
 - Next to Appointment Type select “Other”
- Select a Billing Code
- Click Save
![]()
This will create a purple appointment on the Calendar.
When you’re ready to access your encounter, just click the notepad icon like normal.
Start Via the Client Chart:
- C
 lick on your client’s name to access their chart
 - In the Forms dropdown, select “Custom Form.”
This brings you to our generic “Client Encounter” form where you can adjust Date of Service, Facility and other details for the encounter. - If you make adjustments, click “Save” otherwise click “Cancel”
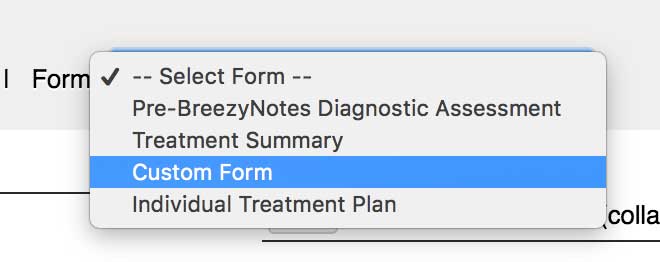
Accessing Your Custom Form:
Once you’ve made it to the encounter summary via the steps above:
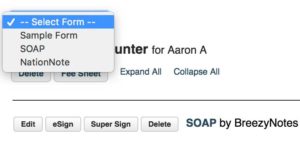 Choose your form from the “Select Form” dropdown in the top-left corner of your window.
- Your form will automatically pop up.
- When you are ready, click the Save button to save your progress and return to the Encounter Summary
- You may return to your note by clicking “Edit”
- If you are done, click “eSign” to lock the form.
- Ready to bill the encounter? If you have access to submitting claims, simply click the “Submit to Clearinghouse” button.
