
Filing Cabinet to Backpack – Private Practice DIY
One of the benefits of electronic health record applications like BreezyNotes EHR is that you don’t need those big filing cabinets anymore. All your notes, finances, anything can be stored securely in the cloud and accessed from almost anywhere.
But now that you don’t need them, what are you supposed to do with them? Space holders? End tables for your guest room?
Most people just throw them away. But what if, instead of dumping it, you turned it into…
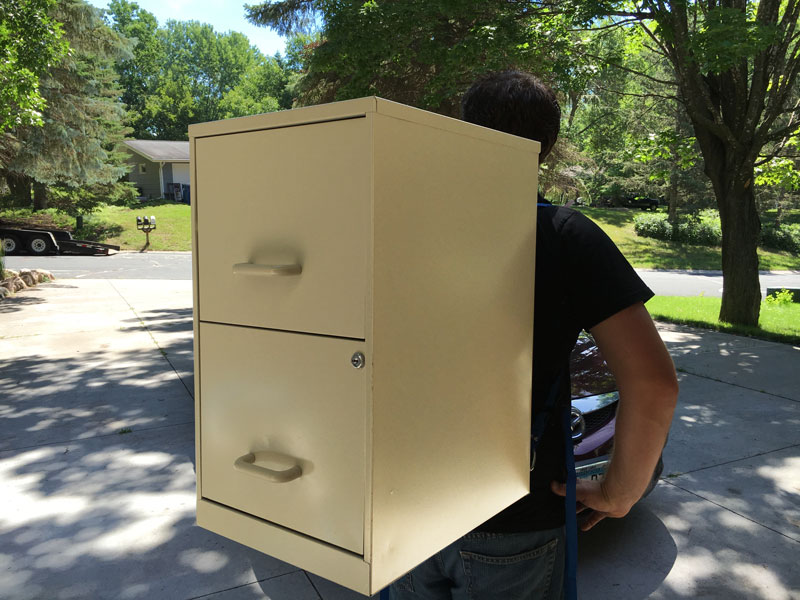
… a backpack?
It sounds ridiculous, but that’s exactly what we did. And the good news is you can do it too!
Read on to learn how YOU can transform your useless filing cabinet into a high-capacity backpack.
What You’ll Need
Tools:
- Screwdriver
- Lighter
- Drill (¼” bit)
- Tin snips or industrial scissor
- Awl
- Pencil
- Ruler/measuring tape/something to draw a straight line with
Parts:
- 2 inch rivets – 5/32” rivets (4)
- #6 finishing washers (4)
- Nylon locking tie-downs (including the strap and the lock) (2)
- #10 lock washers (8)
- #10 nuts and bolts (8)
- Wire-ring anchors (4)
Part 1: Make a base for the straps

First, you need to make a base for the straps that will go over your shoulders:
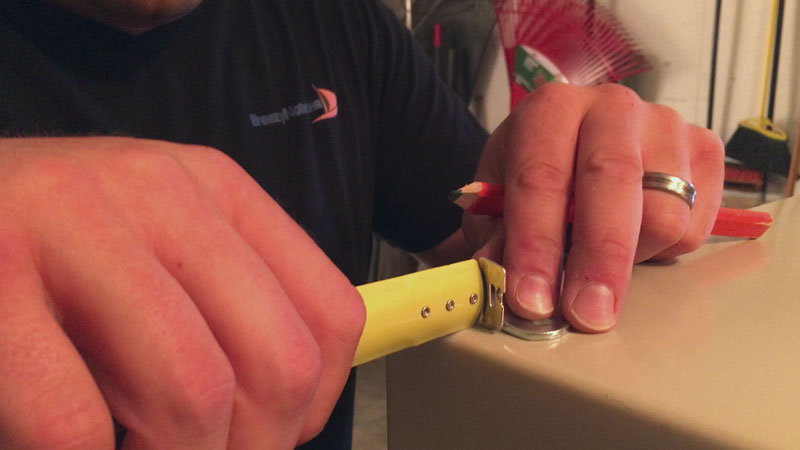
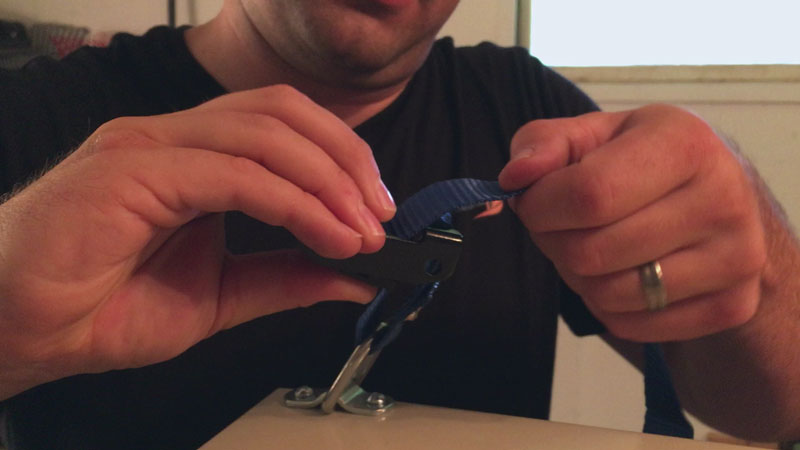
- Cut a 6 inch-long segment off the nylon strap. Make sure to lightly burn the cut end with the lighter to smooth the edge. This will leave you with a 6 inch-strap and a long strap.
- Grab 2 wire-ring anchors and remove the rings from them.
- Take the 6 inch-strap and loop it through 1 of the rings and 1 of the locks for the tie-down until it forms a loop. Make sure there’s at least an inch of overlap.
Want to make a backpack, but your filing cabinets are full? Check out BreezyNotes EHR, the electronic health records application that will help you empty those cabinets!
- Use the awl to pierce 2 holes through the overlapping segment of the 6 inch-strap. Note: Keep the 6 inch-strap looped through the lock and ring. Don’t take the loop apart.
- Put a rivet through one of the holes and attach a finishing washer to the end.
- Use the rivet gun to secure the rivet and finishing washer.
- Repeat steps 4 and 5 with the other hole.
- Repeat the previous steps to create another base.
Part 2: Measure for the bottom anchors
Next, you’ll need to mount the bottom anchors to the filing cabinet:
- Remove the drawers from the filing cabinet. This will make it easier to work with.
- Set the filing cabinet face-down.
- Grab 1 anchor and position it vertically on the back of the filing cabinet. Make sure it is 1 inch from the bottom of the cabinet and 1 inch from the side.
- Use the pencil to make a mark in each of the anchor’s holes.
- Repeat steps for the other side.
Part 3: Mount the bottom anchors
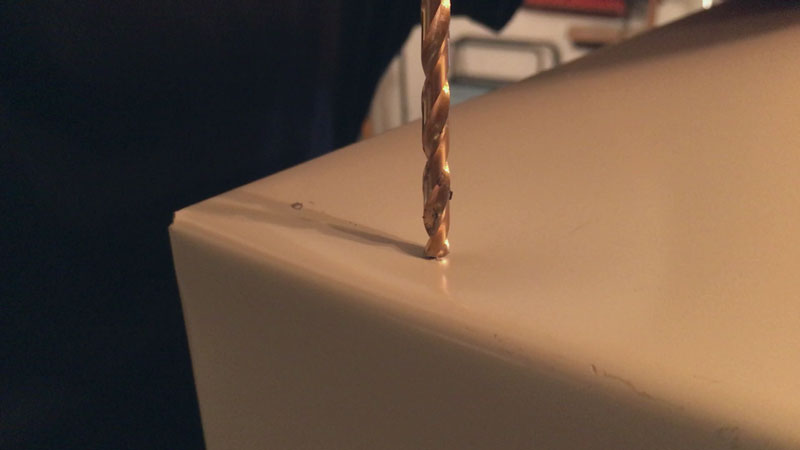
- Use the drill to drill a hole where each mark is.
- Set 1 base and 1 anchor above one pair of holes.
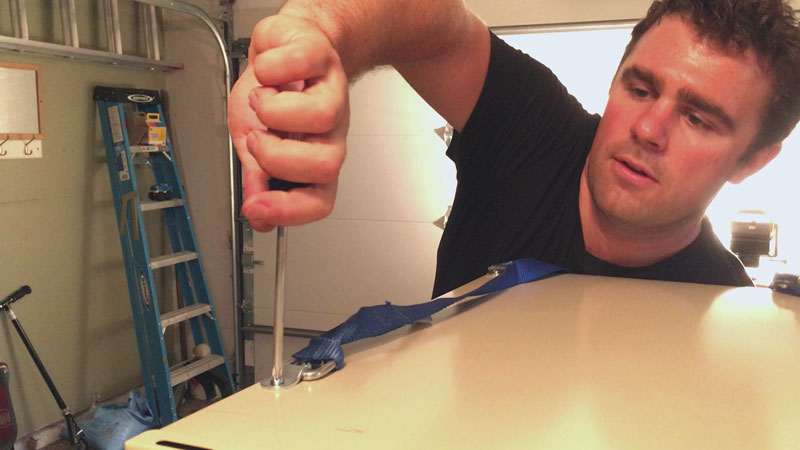
- Put a screw down through each hole from outside the filing cabinet.
- From inside the filing cabinet, put a lock washer and nut on each screw and finger-tighten the nut.
- Then, further tighten the nuts using a screwdriver. Note: You can either hold onto the nut with your fingers or, for a tighter fit, use a wrench.
- Repeat steps 2 through 5 with the other anchor/ring on the other side of the cabinet.
Part 4: Measure for the top anchors

Next, you’ll need to mount the top anchors to the filing cabinet. Where you mount the anchors will depend on your body and how you’d like the backpack to fit.
- Set the filing cabinet back up how you will be wearing it.
- Stand so that your shoulders are at a comfortable height in relation to the cabinet.
- Use the pencil to mark the height of your shoulders on the filing cabinet.
- Make an additional mark for each shoulder where you’d like the straps to rest on your shoulder horizontally (probably the meatier part of your shoulder).
- Put the filing cabinet face down again.
- Use the ruler to draw a straight line across the cabinet that lines up with your shoulder height mark.
- Grab 1 anchor and line the center of it up with the height line.
- Keeping the center of the anchor on the height line, line the anchor up horizontally with the mark you made for the strap position.
- Use the pencil to make a mark in each of the anchor’s holes.
- Repeat steps 7 through 9 with the other anchor for the other shoulder.
Part 5: Mount the top anchors
Now, you’ll need to attach the long straps to the top anchors and then mount the top anchors to the cabinet.
- Tie the long strap to the ring.
- Use the drill to drill a hole where each mark is.
- Set 1 ring and 1 anchor above one pair of holes.
- Put a screw down through each hole from outside the filing cabinet.
- From inside the filing cabinet, put a lock washer and nut on each screw and finger-tighten the nut.
- Then, further tighten the nuts using a screwdriver.
- Repeat steps 2 through 5 with the other anchor/ring on the other side of the cabinet.
Part 6: Assemble the straps
The last thing you need to do is attach the long straps to the base of the straps.
- Take the loose end of 1 long strap and thread it through the corresponding lock.
- Repeat step 1 with the other long strap.
- Adjust the length of both straps using the lock and then try on the backpack to see if it’s comfortable.
- Repeat step 3 as many times as is necessary.
- Put the drawers back in the filing cabinet.
- Look incredibly cool.

Look incredibly cool.
That’s how you transform a useless filing cabinet into a functional backpack.
Do you think this is a useful idea? Share this post or the video on social media! Your fellow clinicians will love it!
What else do you think we could transform a filing cabinet into? Hit us up on Facebook, Twitter, LinkedIn or Google+ with your ideas for a private practice DIY hack. If we love your idea, we’ll do it on the next Private Practice DIY.
And if you want to see the filing cabinet backpack in action, make sure to find us in Denver at the American Psychological Association convention from August 4-7. We’d love to chat with you!