
Pro Tips: Attach a File to a Specific Client Encounter
When you’re using BreezyNotes EHR, you shouldn’t have to store ANY files in your computer or in an obsolete filing cabinet. That’s why we allow you to upload files and store them with a client.
But, you can also upload a file and attach a file to a specific encounter you had with that client.
Don’t want to throw out your obsolete filing cabinet? Click here to get great ideas for reusing it!
Did you use an existing evaluation during your last session? You can attach it right below the progress note. Did your client create a piece of art? You can scan it into your computer and attach it to the session, so you don’t have to worry about losing it.
Here’s how you attach an uploaded file to a specific encounter in BreezyNotes EHR:
Uploading the File
We’ll recap quickly how to upload a file into the system. If you already know how to do this, skip to the next section.
- Navigate to the client summary.
- Click “Scan Documents” link.
- Click “Scanned Documents” folder (and a specific folder if you use them to organize your files).
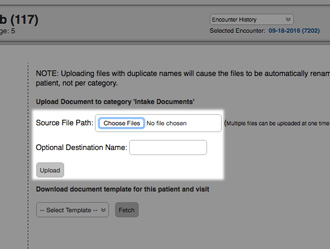
- Click “Choose Files” on the right and select the file you wish to upload.
- Click “Upload”.
Attach the File to a Specific Client Encounter
- Find the document you just uploaded and click on it.
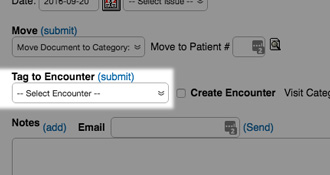
- Under the “Tag to Encounter” dropdown, select the Date of Service tied to your encounter.
- Click “(submit)”.
Now if you ever want to access that file, you can find it by navigating to that encounter in the client’s encounter history.
Bonus Tip
If you’d like to customize the file structure of your Scan Documents folder, we can do that for you! Just submit a request to our support team with the folders you’d like added!