
Pro Tips: Deleting or Changing Appointment Details After the Notepad Icon has been Clicked
09.08.2017
Pro Tips
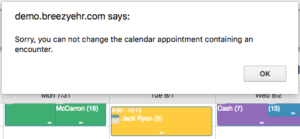
Changing yellow appointments requires some extra steps.
Normally, to make changes to an existing appointment (like changing the appointment type, date, etc.), you just click on the colored part of the Appointment Box and the Appointment Window pops up.
However, once the notepad icon has been clicked, an encounter is created and the client is considered “Checked In.” This effectively locks the appointment details into place and changes the Appointment Box to yellow.
To make a change after the Appointment Box has turned yellow, you’ll need to delete the entire encounter:
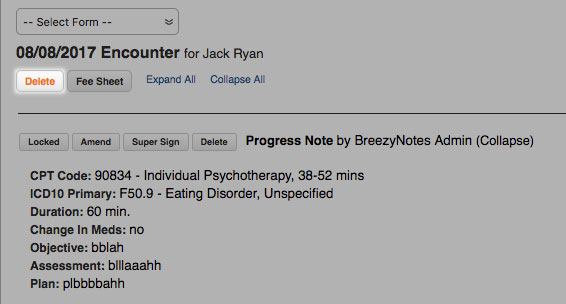
If you’ve already created a note for the encounter, it will be deleted.
- In the client’s chart, click Encounter History and select the Date of Service you want to change
- Click the Delete button (next to the Fee Sheet button) to delete the encounter.
BEWARE: If there is a note saved on this Encounter, it will also be deleted.
Now the appointment should show up in its original color. To make your changes:
- Click the colored part of the Appointment Box to open the Appointment Window
- Make the required changes
- Click Save