
Reports > Financial > Collections
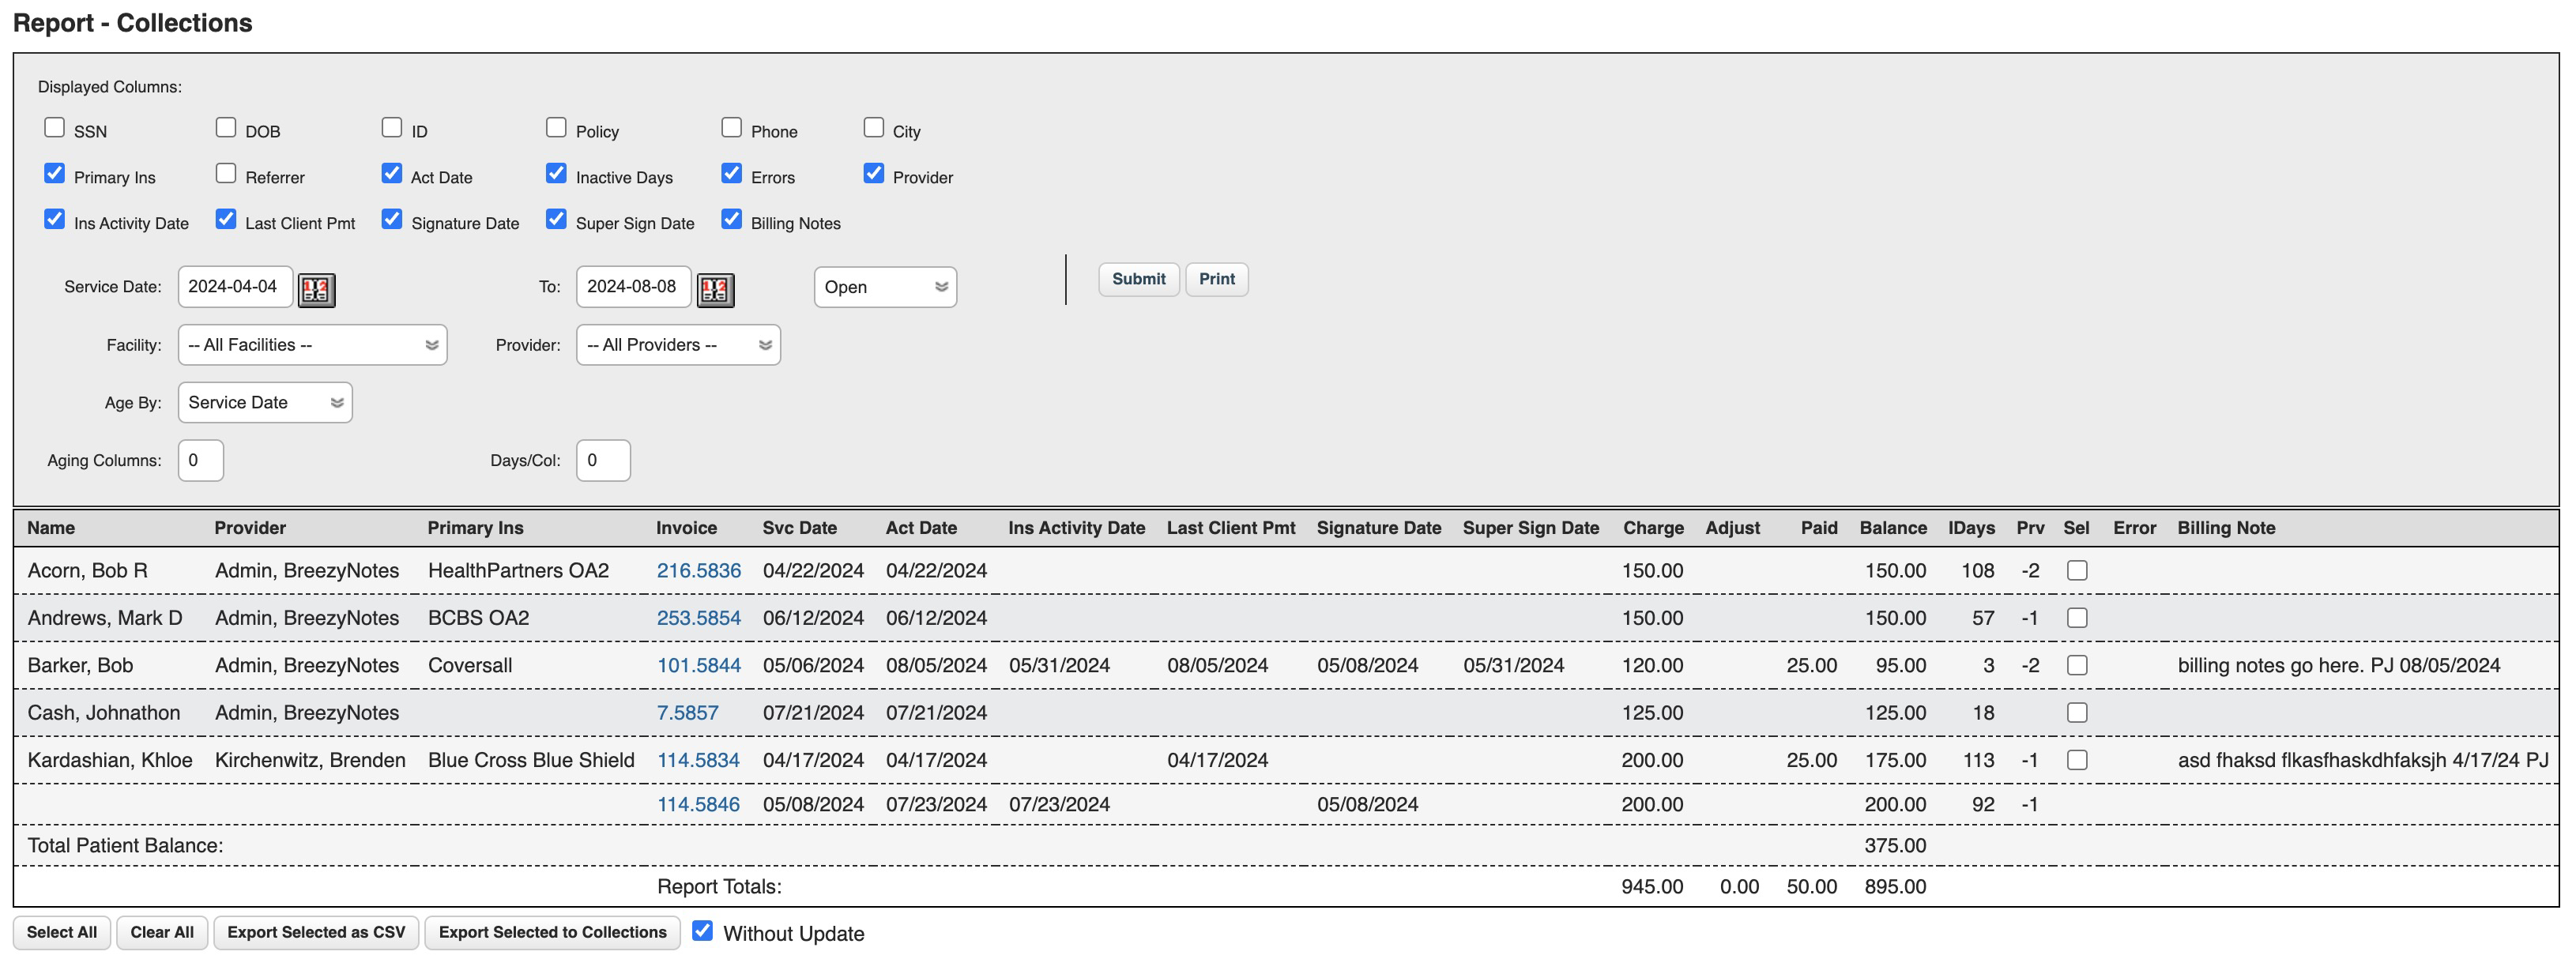
The Collections report is our most powerful report. It shows your accounts receivable and a host of other relevant data points. If you’re going to keep a pulse on your practice. This is the report to do it.
What it Shows
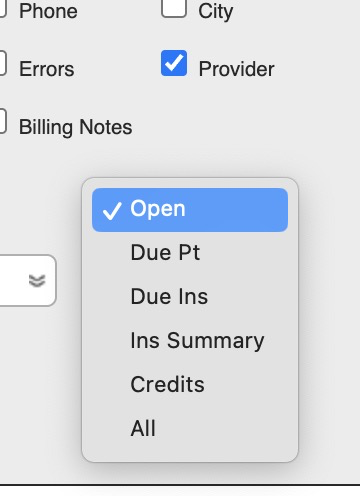
The Collections Report can show you:
- All Open balances
- What is due from just your patients
- What is due from just insurance
- A summary of claims processed by insurance
- Claims with credits
- Every Encounter in our system for a time period.
Additional Breakdown
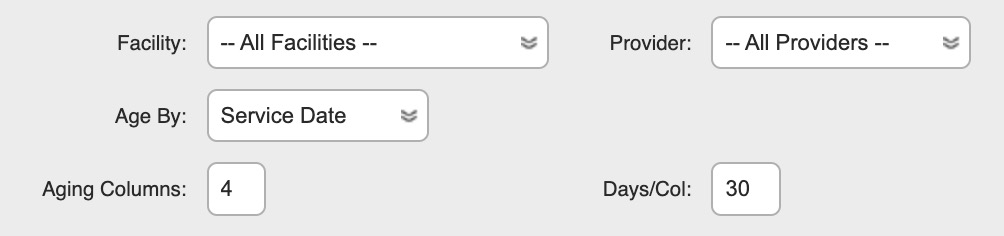
The Data can be further broken down into Facility, Provider, Date Type, as well as Aging Columns and you can dictate how many days per column.
TIP: Set Aging Columns to 4 and Days/Col to 30 to get your “30/60/90” day breakdown.
Additional Encounter Data

Additional Data
In addition to financial data, you can select what client and encounter context you’d like included in you report.
- SSN – Client’s Social Security Number
- DOB – Client’s Date of Birth
- ID – Client’s Unique ID (if using)
- Policy – Client’s Primary Policy #
- Phone – Client’s Phone Number
- City – Client’s City
- Primary Ins – Client’s Primary Insurance Carrier
- Referrer – Referring Physician
- Act Date – Activity Date. The last date of financial activity on the clais
- Inactive Days – How long it’s been since the last Activity Date
- Errors – any errors on claim
- Provider – Provider Name
- Ins Activity Date – last date of activity from an insurance claim. Blank if no activity.
- Last Client Pmt – the most recent date a client made a payment ont he claim. Blank if no payment.
- Signature Date – the most recent provider signature on a encounter. Blank if no signature
- Super Sign Date – the most recent supervisor signature on an encounter (assumes the Supervisor clicks the “Super Sign” button.)
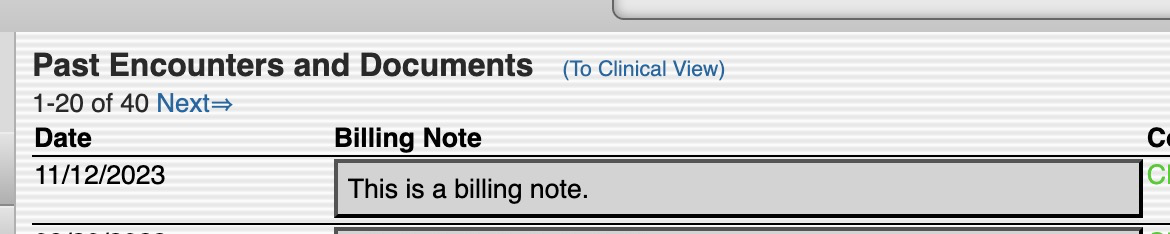
- Billing Notes – Billing notes on the claim from the Encounter History > “Billing View”
Export the Collections Report
The Collections report can be exported as a csv file so you can further manipulate data.
IMPORTANT NOTE: Leave “Without Update” checked. Unchecking that box and exporting will put all clients in a “Collections” state.
To Export the Collections report:
- Run the report so you get data.
- At the bottom of the report, click the “Select All” button or check just the client’s you’d like included.
- Click the “Export Selected as CSV” button