
Progress Notes
30.05.2024
3.0, Getting Started (Outpatient Vers 3.0), Support Posts, Uncategorized
Progress Notes tie together the documentation completed in the Diagnostic Assessment and the Individual Treatment Plan (ITP).
Creating a Progress Note
These forms can be accessed via the Calendar when creating an appointment or through the Forms dropdown in the client chart
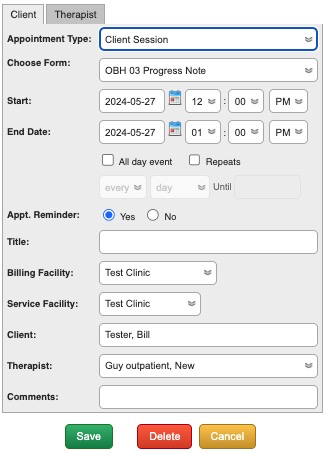
Choose the form you need under the “Client Session” Appointment Type. Once the appointment is scheduled, click on the notepad icon on the Appointment Box to open it.
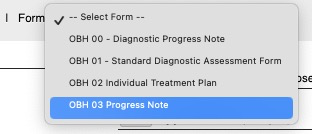
Select the form from this dropdown. You will also need to set the Date of Service and Start/End times as appropriate.
Progress Note Settings and Administration
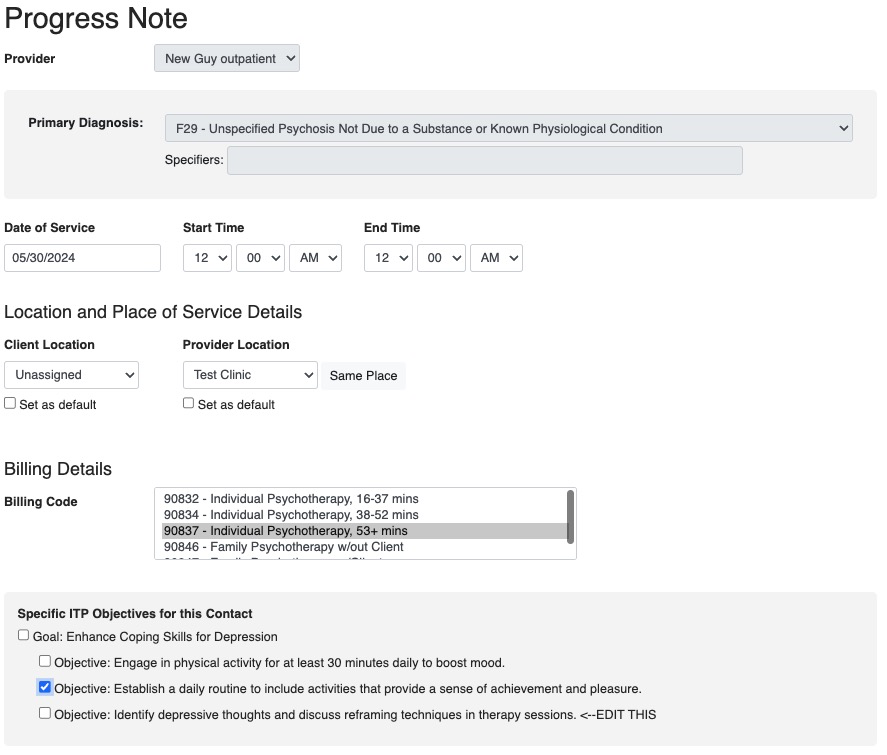
By default, an Outpatient Progress Note includes:
- The Provider
- The Primary Diagnosis from the Diagnostic Assessment form
- Date of Service and Start/End Times
- Location and Place of Service Details
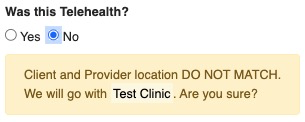
- If the Client Location and Provider Location are different it will ask if the session was Telehealth
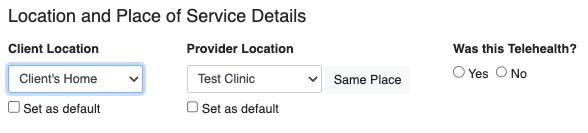
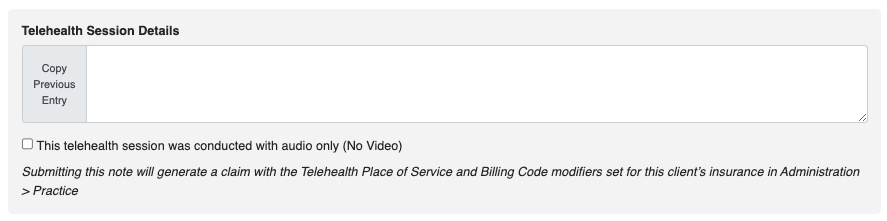
- Selecting “Yes” will open the Telehealth dialogue
- Selecting “No” will double check if you made the right choice since you indicated that you and the client are in different places
- If the Client Location and Provider Location are different it will ask if the session was Telehealth
- Billing Details
- By default our Progress Note is a session based note, meaning you can only bill one unit per session
- You can choose multiple billing codes by holding the Ctrl (PC) or Cmd (Mac) button while clicking
- For example 90837 is selected by default for your one-hour session, then Ctrl or Cmd click 90785 to bill for Interactive Complexity
- Whatever you choose, one unit of each selected code is what will be billed.
- Goals and Objectives from the ITP
- Your Progress Note Fields – our default is a SOAP note, but during setup that may be changed or customized.
- Close out a Note – At the bottom you have four options:
- Save, Save and Close, Save & Sign, Save, Sign & Submit

- When you SIGN a note it will be locked and you will not be able to edit it without higher-level access.
- Save, Save and Close, Save & Sign, Save, Sign & Submit
- You will not be allowed to Save, Sign & Submit a note unless the minimum needed for it to be billable to insurance is there:
-
- Diagnosis
- Date of Service
- Billing Code
- Insurance on file for the client
-