
Entering Client Copays
07.10.2025
Billing, Payments, Support Posts
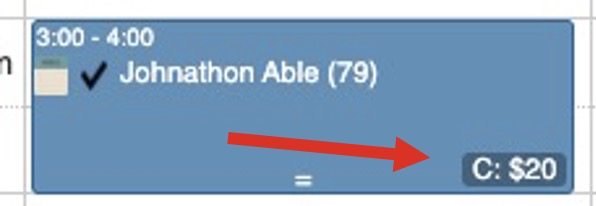
When a Client has a Copay listed in the insurance section of the chart, it will show on their appointment:
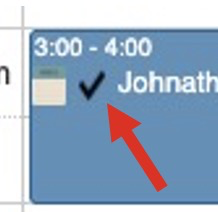
To take payment for a client’s copay prior to the session:
- Click the checkmark on the client’s appointment to ‘check’ them in:
- A “Check In” window pops up:
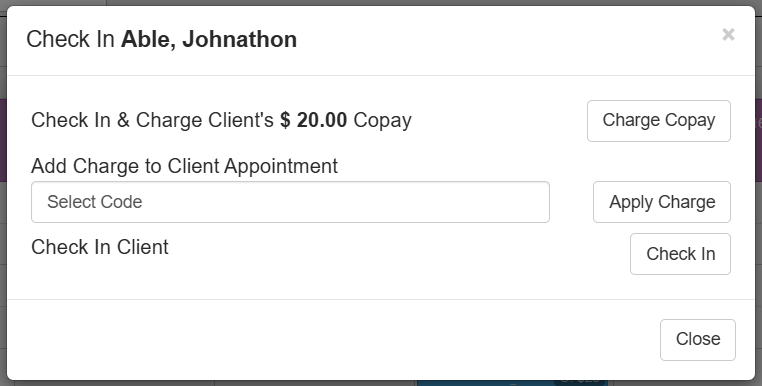
- Click Charge Copay. This will apply the copay to their account, check the client in and take you to the payments screen.
- In the Payments screen that opens, you’ll see a list of the client’s open balances with the “Required Co Pay” amount shown:

- Update your Payment method information, make sure “Co Pay” is selected, and enter the payment amount in the “Paying” column

- Click Charge Card (if paying by credit card) or Post Payments at the bottom of the screen.
- A receipt will be generated and the copay amount will show up in the client’s chart
- IMPORTANT: Because a Fee Sheet is not generated until you sign a note, you may notice a negative insurance balance until the note for that DOS is signed.