
Loading Existing Client Documentation into BreezyNotes for ARMHS
08.06.2026
ARMHS, ARMHS 3.0, Support Posts, Uncategorized
How to Load Existing Client Documentation into BreezyNotes for ARMHS
When importing clients as a new customer or if someone outside of your ARMHS clinic is completing and billing Diagnostic Assessments, there are some important steps to follow to make sure the info is in Breezy accurately.
How to Load an Existing Diagnostic Assessment (DA) into BreezyNotes
You will need to know the Date of Service the Diagnostic Assessment was completed and the client’s diagnoses codes.
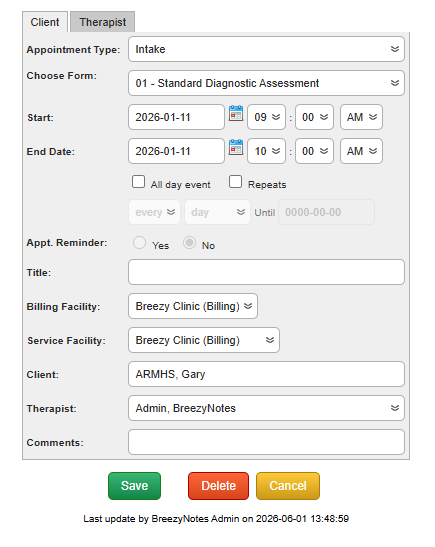
- Make a note of the service date
- This is VERY important as Breezy utilizes the date of service to ensure forms are valid.
- They also need to be signed to be valid.
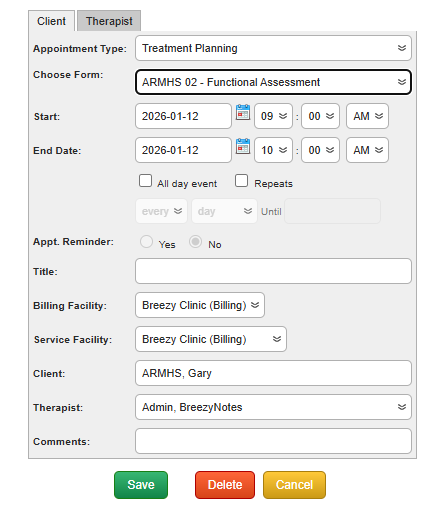
- Schedule the appointment for the same date as when it was filled out
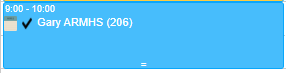
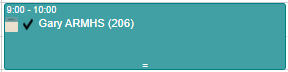
- Find the appointment on the scheduled day and click the notepad icon
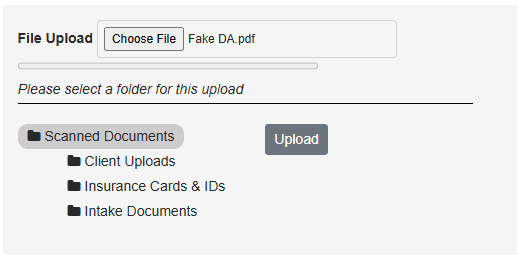
- At the top of the form, click the Choose File

- Select the DA you want to upload and click Open
- Select where you would like the file to be uploaded to and click Upload
- You can skip all of the form EXCEPT for the diagnosis
- Scroll to the bottom of the form and select all diagnoses applicable
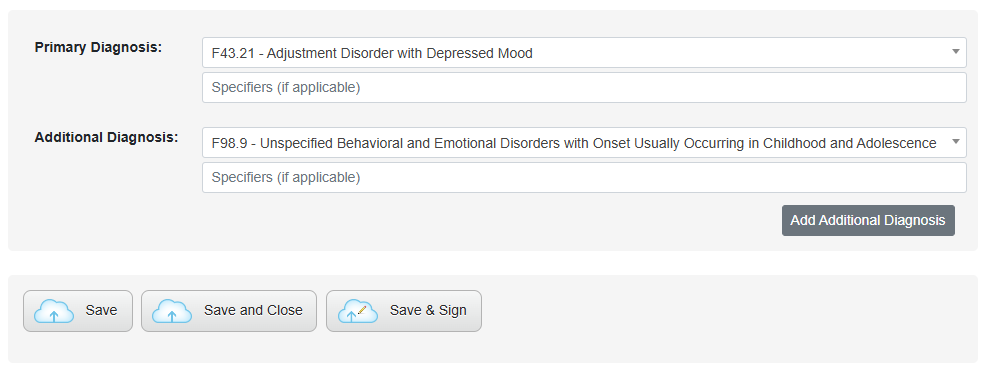
- Once Diagnoses are selected, click Save & Sign
- Scroll to the bottom of the form and select all diagnoses applicable
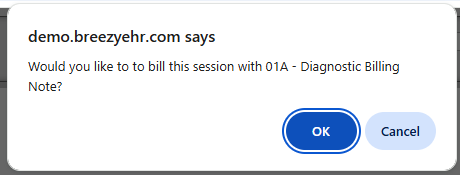
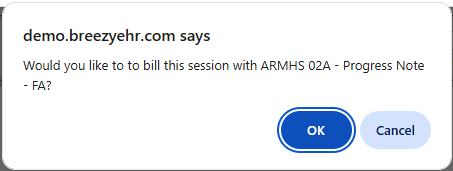
- A message will popup asking if you want to bill for the time, click Cancel to not charge for the time
How to Load an Existing Functional Assessment (FA) in Breezy
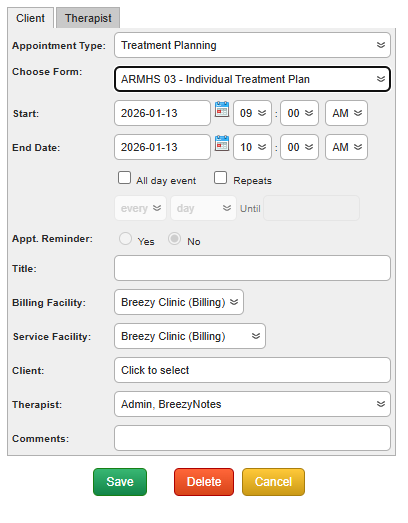
- Similar to the DA, make a note of when the Functional Assessment (FA) was filled out and schedule an appointment for that time
- Click on the notepad icon to open the form
- At the top of the form, click the Choose File button
- Select the form and click Open
- Select where you would like the file to be uploaded to and click Upload
- Scroll down to the bottom of the form, and click Save & Sign.
-
A message will popup asking if you want to bill for the time, click Cancel to not charge for the time
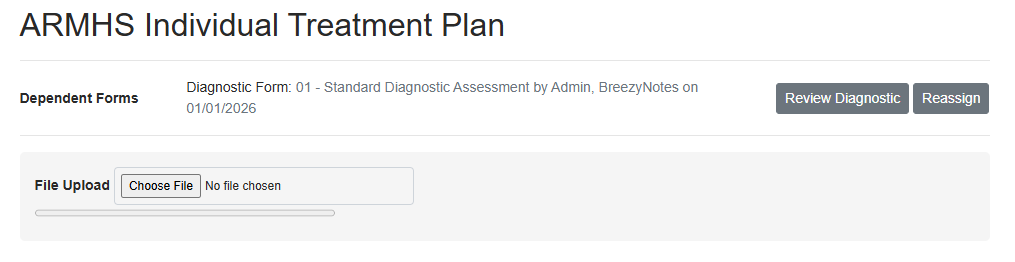
How to Load an Existing Individual Treatment Plan (ITP) into BreezyNotes
- Just as you did with the DA and FA, make a note of when the Individual Treatment Plan (ITP) was filled out and schedule an appointment
- Click on the notepad icon to open the form
- At the top of the form, click the Choose File button

- Select the form and click Open
- Select where you would like the file to be uploaded to and click Upload
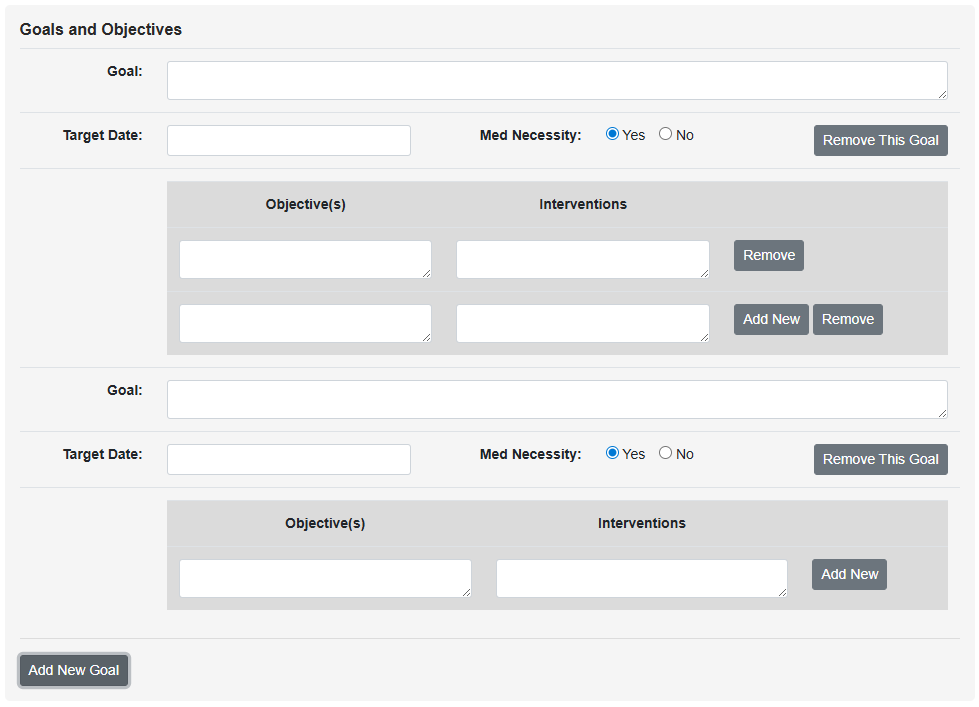
- Fill out the Goals, Objectives & Interventions section.
**This is REQUIRED so your progress notes are properly documented.
- Add all goals, objectives, and interventions
- Once all goals have been entered, skip the rest of the form, scroll to the bottom and click yes on the Is the Client or Guardian Signature on File? question

- Click Save and Sign

- A message will pop up asking if you want to bill for the time, click Cancel to not charge for the time
