
Cancel and Resubmit a Bad or Incorrect Claim
08.01.2016
Billing, Support Posts
Step 1: Find the Payer Control Number
(also know as a Internal Control Number (ICN) or Claim Control Number)
- Click on the claim to open the Claim Detail.
- On the far right is the Message Center. Click on the Related tab.
You’ll see a list of files related to this claim.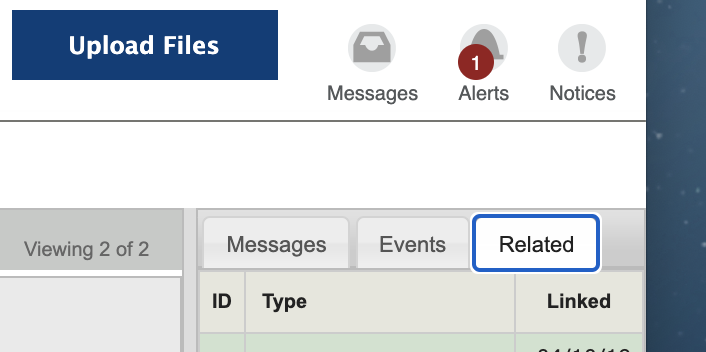
- Click on the one that starts with “Remittance.”
The remittance advice for that specific claim will open in another tab.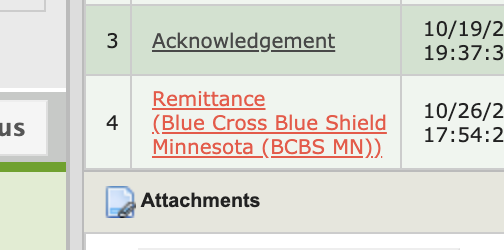
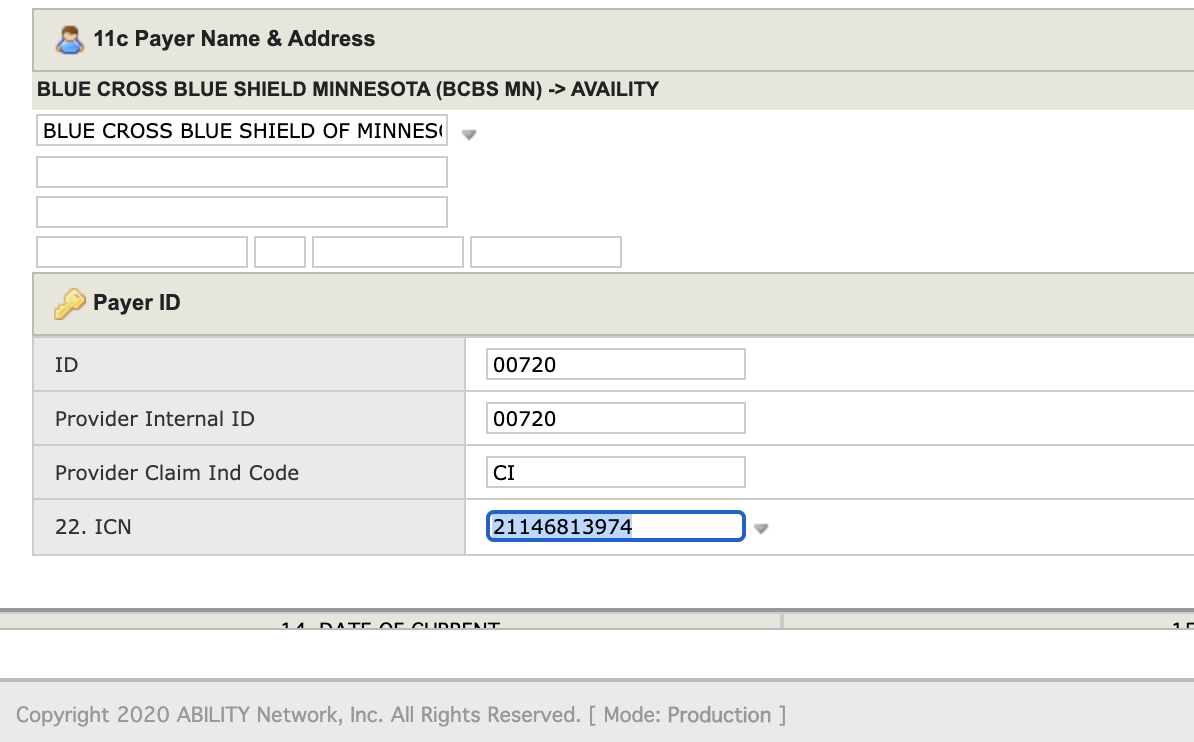
- In the Claim section, locate the Payer Control Number (or PCN).
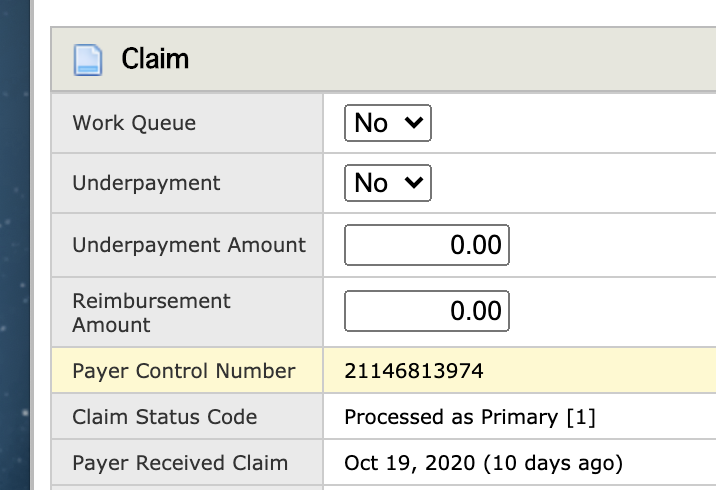
- Copy the PCN and go back to the Claim Details tab. In Box 22. ICN of the “Payer ID” section, paste the PCN.
Step 2: Update “Claim Frequency Type” to Indicate this is a Corrected Claim
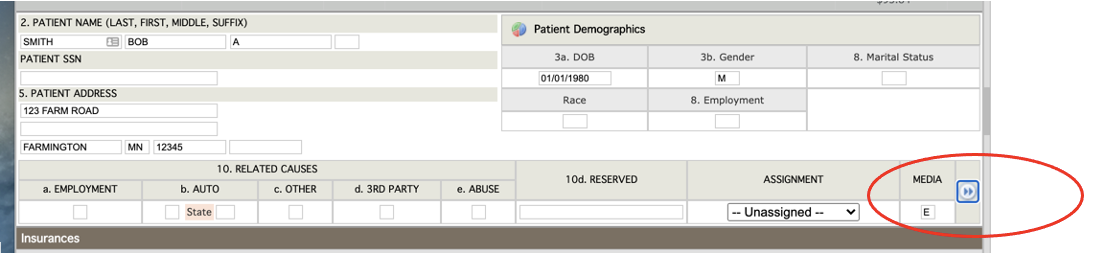
- In the claim details, near the MEDIA field, click the double arrow icon (
 ).
).
- An “Additional Data” window will pop up. Change the last number in the POS field from a 1 to a 7.
1=Initial Claim. 7=Corrected claim. The first two numbers are the
Place of Service (i.e. 11=Office, 02=Telehealth). Don’t change those.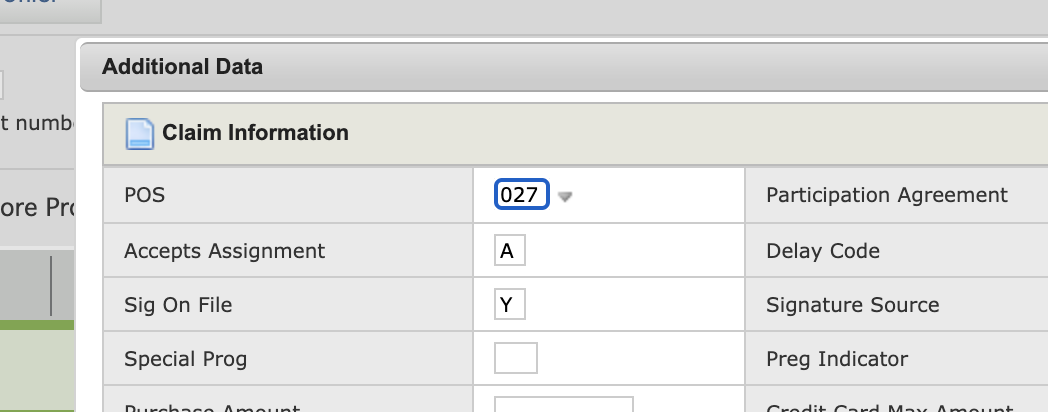
- Click “Done”
Step 3: Make Corrections and Resubmit
- In the Claim Detail section, make the necessary correction(s).
- Under the Transaction menu, choose “Save & Validate.”
